Pages

Showing posts with label Christmas. Show all posts

Wednesday, December 26, 2012

Embroidery Projects

Since I've had so much time on my hand one of my main gifts for Christmas this year was making embroidery pieces.  I made 8 in total for 7 different people.  I feel a little strange today not having something to work on, even though I've been dying to finish all of them.  Strange.


Anyway, I thought I would share the photos of my pieces with you now that they have all been gifted.  I am rather proud of them, even if they aren't perfect.  (And Kayla would gladly point out the part of one of my pieces that has a mistake.  I must remember not to tell her things like that.  She has a wicked memory and loves to share those things.)


Hope you like the photos and my attempts at 'creativity.'  I am putting the links for patterns that I was able to get for free so that you can make them too and to give credit where credit is due!  You can also find all of the free patterns on my Pinterest Sew like the wind: Embroidery Board.  My Pinterest is just listed under my name, April Bumgardner.


This one was made for my sister-in-law Angela.  I found the base balloon pattern here.  I then got creative with my own unique patterns for the balloons.

This one was made for my cousin Charlene.  It was the first one I finished and was a new type of embroidery for me that it was on a VERY heavily patterned fabric.  I found the dress pattern here.

This was made for my Aunt Eileen.  This was also a major experiment for me.  I stitched this onto scrapbook paper.  It was a bit harder than I thought, but the overall effect came out so neat I ended up doing 2 other projects on scrapbook paper.  (One was made for my niece for her birthday.)  I found the pattern for this design here.

Kayla, my niece, helped me pick this pattern out for her mom, my sister-in-law Megan.  The M can be either Megan or Mom.  The original pattern did not have all of the vines, but I felt it was a little lacking and added to it.  The base pattern was found here.

My cousin Michelle loves irises.  So, when I saw this pattern I knew I had to make it.  I really like the way this came out, even if all the satin stitching was a bit painful.  It was so worth the effect!  I found this pattern here.

This was another major experiment.  I made this design on scrapbook paper and added real buttons to the piece.  My Mom is obsessed with button crafts lately, so I thought it was perfect.  I really love the way this came out.  I think it is my favorite.  I found the pattern on this site.

This last design was for my Dad.  It is the only pattern of these that I actually purchased.  I just loved it though and thought it was perfect for him.  I purchased it from Urban Threads along with several other patterns that I will be working on for myself and others in the near future.
I have to say in closing how appreciative I am of all the wonderful people who post great free patterns.  I have no drawing ability and people who make these patterns and post them for use are wonderful.  Thanks so much for making my gift giving easy and affordable!

Saturday, December 8, 2012

Elf-on-the-Shelf: Wrapping

I am understanding a little more now why Max is an Elf-in-Training to be an Elf-on-the-Shelf instead of, say, a wrapping elf.  We went out for a little bit tonight as I haven't been out of the house since Monday and wanted to get something at the store.  When we got home I found the scene below:


Evidently Max was feeling a little remorse over the past couple of days when he got into some mischief.  I appreciate his effort to help.  However, he really isn't good at wrapping; he had himself all taped up; and I had to undo everything.  But, as they say, it is the thought that counts.  Thanks Max!

I hope you're enjoying our adventures together and my photos!  Merry Christmas!

Friday, December 7, 2012

Elf-on-the-Shelf: Popcorn and White Christmas

Max, Max, Max, Max, Max!  This Elf is being ornery!  Yesterday I should have learned my lesson.  I didn't and neither did he!  I changed the password on my cell phone, but didn't think to change the password on my laptop.  Since they were both the same, Max got on my laptop.

Tonight my nephews came over to be with us.  While we were upstairs toward the end of the evening Max really went all out.  We must have been making a lot of noise because I didn't hear a thing.  He popped a bag of popcorn, moved the baby's swing, set up the laptop on the recliner, and started a movie on Netflix!  When I came downstairs he was gently swinging in the swing, on a blanket, with a bowl of popcorn, watching 'White Christmas.'  Now I need to change the password on my laptop too!

I wrote a quick email to Santa to let him know what Max has been up to.  I don't mind too much but, I don't want him to go any further and if he is going to be going to some child's house next year, he needs to shape up a bit.  Oh Max! 

Well, he is in bed; early again and I am going to try to work on some Christmas presents!  I have included a couple of pictures of the 'brat' in action!  Don't laugh; he's in trouble!  Merry Christmas!


Thursday, December 6, 2012

Elf-on-the-Shelf: Pinning

Evidently Max is familiar with technology.  I would not have expected it but I found it to be true.  And he must have been watching me while I was on my phone because somehow he figured out my password...

This afternoon, I went upstairs for a little bit and when I came back down I found Max sitting on the couch with my phone open, on the mobile Pinterest site.  Guess what he was looking at?  Candy canes.  Pins about candy canes.  There were a lot and they were interesting, but I am not comfortable with this little Elf playing with my phone.  Who knows what he could have done!  Heaven forbid he get on my mobile Amazon site.  He could have gone crazy with one-click purchasing!

So, now I have put Max to bed early with a firm talking to and am going to change the password on my phone.  This Elf thing is turning out to be more challenging than I thought...

Enjoy the picture of Max anyway (even if he is getting into trouble) and Merry Christmas!


Wednesday, December 5, 2012

Elf-on-the-Shelf: Climbing?

This morning Max wasn't on the washing machine where he normally is.  I was worried.  Did he forget to come back?  Was he somewhere in the house up to something?  Where was he? 

Well, it didn't take me long to find out.  Before I went to search for clues I needed to head into the bathroom to clean up and get started for the day.  As soon as I walked in the door I spotted him.  Evidently Max decided to do a  little climbing.  The theme in the downstairs bathroom is an ocean theme and there is 'fishing net' that hangs on the wall with various things in it.  One of the things hanging in it this morning was Max.  He looked like he was a bit stuck.  His arm and leg were both twisted in the rope.  I wish I knew how long he had been there. 

I wanted to be upset with him, but something tells me he was probably regretting trying to climb up the net and getting stuck.  It was probably a pretty scary thing!   What an Elf!  Oh well, hope you have a good day and enjoy this picture of Max climbing in the bathroom.  Merry Christmas!


Tuesday, December 4, 2012

Elf-on-the-Shelf: A Note

This morning was a delightful surprise!  Max brought a note back for me!  It looks like he wrote it himself and he even drew me a tree!  It is so sweet and I am not as frustrated about having to clean up some of his messes.  He may be a little bit of a rascal, but he really is cute! 

This morning Max was on the washing machine as he has been the last several mornings and he had this note with him.  Isn't it sweet?
My day has started out really nice and I hope your has (did) too! Now I have to work on studying since he has reminded me (my niece has been on me about it too) and write up my Christmas listMerry Christmas!

Sunday, December 2, 2012

Elf-on-the-Shelf: Frosty the Snowman

Today is Max's second day with me.  We had a nice quiet night and I am assuming he went back to the North Pole over night at some point. I didn't have a note or anything from Santa; but I'm not expecting too much.  I will say that I am pretty sure he did go somewhere as I laid him down on the recliner to 'sleep' again, with a stern warning about parties, and in the morning he was sitting on the washing machine. I didn't find anything out of place, so as of now I am not concerned.

This afternoon though, Max seemed to get restless.  While I was upstairs for a while he must have been looking for something fun to do.  When I came back down stairs I found him reading a book.  Check out my pictures below!


This is a really old copy of 'Frosty the Snowman' that my Mom got a few weeks ago.  He really seemed to be enjoying it.  I was a little frustrated when I saw that he had gotten into the candy again; but I won't make a big deal about that.  He sure looks cute reading his book!

Anyway, hope you like Max's picture for today.  He had a good day and I hope he keeps it up!  Merry Christmas!

Saturday, December 1, 2012

Elf-on-the-Shelf: Max Arrived...

At about 5:30 this morning I woke up to a strange sound.  I laid in bed for a moment and listened.  The sound of tinkling Christmas music was coming from the opposite side of the wall.  I was rather confused, and a little nervous.  However, I knew I needed to check it out; and I wanted to go back to sleep. 

So, I got out of bed and went to see what was going on.  Boy was I in for a surprise!  Max, the Elf-in-Training had arrived.  He didn't just show up and sit on a shelf and bring a note to say hello.  No, he decided to have a party.  With several of the Christmas ornaments and decorations from around the house. A full-out party with snacks, music, a Christmas Tree, and games!  He must be a creative Elf! 

Anyway, as soon as I came around the corner it seemed 'everyone' froze in there spot, but the music that was coming from a snow globe played on.  I quickly cleaned up the snacks, boxed up the ornaments and decorations to be put back in their proper places in the morning and took Max to settle down for the rest of the night.  I told him, rather sternly, that it was the middle of the night and that we do not party and wake people up in the middle of the night.  I laid him down on the recliner, covered him with a blanket and prayed he would sleep for the rest of the night without causing further mischief!

Before I cleaned everything up, I did get a photo of Max and his new 'friends.'  It did look like they were having fun.  I just hope they don't wake me up again and that maybe they can clean up after themselves next time!

Well, I hope you enjoy this first picture of Max.  He is a cute little Elf.  He is very different from the other Elves-on-the-Shelf that my niece and nephews have, but I suppose just like people Elves come in all sizes, shapes and colors!  Happy December and Merry Christmas!

As you can see Max and some of the party goers were playing dice.  Others were enjoying refreshments: marshmallows, chocolates, whipped cream and peppermints!  They event had jingle bells to play to go along with the music from the snow globe!

Max the Elf-in-Training (and friends!)

Friday, November 30, 2012

Elf-In-Training: Letter from Santa!!!!!

Wow!  I am beyond excited.  Today I got a letter in the mail and I can hardly contain myself!  It was from Santa!  He has enlisted my help to train an Elf-on-the-Shelf!  I feel so privileged!  I felt since I have been asked to do this that I would share my adventures with my Elf here with all of you.  Specifically so that my niece, nephews, and my friend's children from across the state and country can see what my elf is up to throughout the month.

So, I will post pictures daily of what my elf is doing (his name is Max!)  Below I've included my first picture of the letter that I received from Santa!  I can't wait until Max arrives and we get to spend some time together!  Let me know if you have an Elf that comes to visit you and what type of things he/she does at your house!  (I'll post the script of the letter below since it might be hard to read on the actual letter.  There is a lot of glitter on it!)


November 26, 2012

Dear Ms. Bumgardner;

I hope this letter finds you doing well.  I know you have been injured and I sincerely hope that you are healing.  Part of my reason for writing you however, is due to your injury.  Since you are currently not working and away from the children that you normally care for I wanted to write and ask you a special favor. 

Each year I send out thousands of Elves to keep watch over boys and girls all over the world.  They help me to keep track of these children and then report back to me on each child’s individual behavior.  I then am able to decide if the children have been good boys or girls and should receive Christmas gifts from me.

Since I am responsible for so many children it requires me to have a large working force of elves.  This year I have many new elves who are in training.  Due to your special skills in child care and  as an Aunt, I have selected you to be an Elf Trainer.  I will be sending one of my Elves-In-Training to come to your house from the night of December 1st through the night of December 24th. 

The Elf-In-Training who will be coming to you is Max (I hear you have a nephew with that name as well); but we usually call him Rascal as he has a slight tendency to get in trouble.  That is specifically why I wanted to send him to you, as I feel you can handle him.

Please let me know if Max causes any trouble.  I will send you an email with my personal account so that you can report to me if there are any problems.

Thank you so much!  Good Luck and I hope you have fun!!!!

Merry Christmas;

Santa Claus

Sunday, January 1, 2012

Family Christmas (and a Birthday!)

So, here they are.  My Christmas pictures.  I don't know why its taken me so long to finally get these done.  I've done several other sets of photos in between and just haven't done these.  Well, now they're finished! 

I hope you like them.  Don't laugh too hard at us.  We're a strange lot, but at least our kids are cute!  Enjoy!!!

Dad on Christmas Eve opening presents.  Love the scarf Mom made him.  Also note the dog's opinion of the entire process!
Mom opening presents Christmas Eve.  A new Dutch Oven for camping!  We are all really excited about this one!!  (seriously, we are...)

A few of my gifts from Christmas Eve (from my parents.)  A cookbook, a beautiful shawl my Mother made and a new devotional.

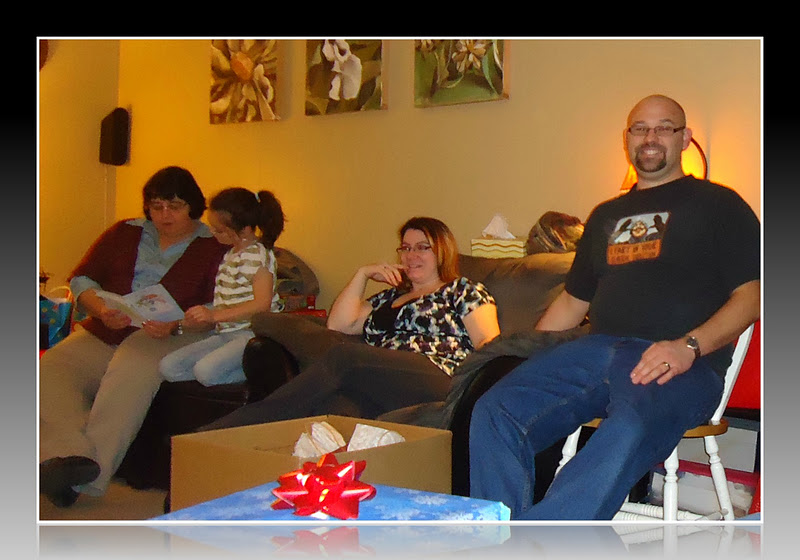
Mom, Kayla, Megan (Logan too) and Phil on Christmas Day at Andy & Angela's!

One of my favorite pictures!  Look at how grown up my boy is!!!!  Nicholas Todd is the coolest boy ever!  (At least in my opinion.  I love that we can talk now for the longest time about books, comics, school, etc.)

Nicholas & Kayla opening a joint gift.  Paul was included but lost interest quickly.

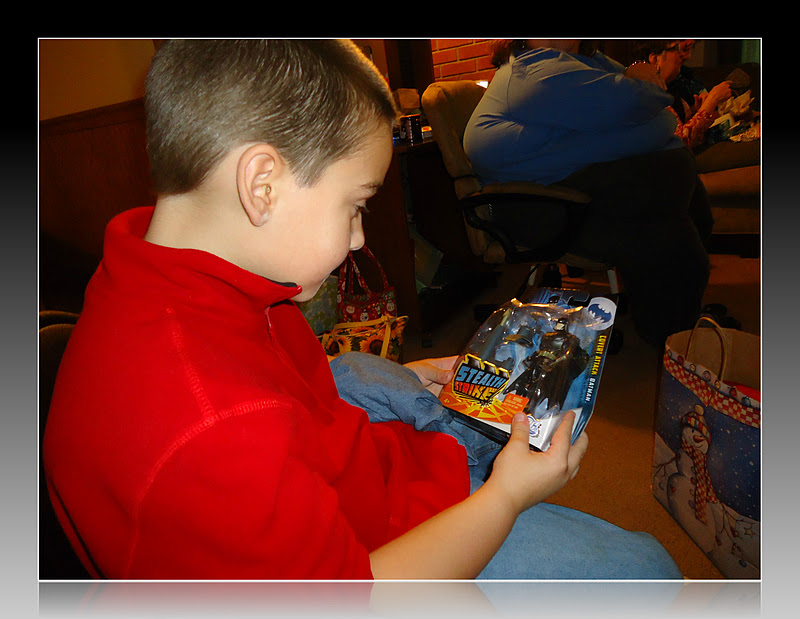
Nicholas with a new batman action figure.

Paul in one of the capes I made him.  How cute is that kid?

Paul watching his Mom (Angela) open a couple of his gifts.

Andy opening his exchange gifts with the family anxiously looking on.

Aunt Eileen opening her exchange gifts.

Nicholas was bored while waiting for the adults to open their gifts. So he read one of his new Spiderman books!

Phillip opening his exchange gift.  A Bart Simpson T-Shirt.

Trying to teach Paul how to play dice.  He throws them more than rolls them.
This picture is circa 2009.  Paul and Uncle Phillip.  Look how little my baby is...

Paul & Uncle Phillip this year.  Look how BIG my baby is!!!!  How the time flies.  Yes, Phillip is wearing the same shirt in both pictures.  (And I have to note, these 2 are so much alike!  Personality and appearance.  Paul also adores his Uncle Phillip.  It is so precious!!!!)
Photo courtesy of Paul Edward Bumgardner.  Picture of Grandma.
Photo courtesy of Paul Edward Bumgardner.  Picture of Grandpa.
Photo courtesy of Paul Edward Bumgardner.  Picture of Aunt April.  (I hate having my picture taken and try to avoid it at all cost.  It is amazing what I will do for my kids.)
Photo courtesy of Paul Edward Bumgardner.  Picture of Aunt Megan.
Photo courtesy of Paul Edward Bumgardner.  Picture of Uncle Clair.
Photo courtesy of Paul Edward Bumgardner.  Picture of Daddy.
Nicholas 'flying' in one of his capes.
Okay.  I love this picture.  He is so cute.  Notice the feet: one sock on, one sock off.  The only problem is, I hate how well he uses this iPad. 
Adorable.
Out to lunch the day after Christmas for Phillip's 30th birthday!!!!
The Old Man himself with his daughter, wife (son) and Mommy.  So sweet.

My baby boy.  But not for long.  Soon he won't be the youngest.  Can you imagine having to say no to this face?  Its tough, but he is a trouble maker.  We do it ALL the time!!!!

Photo courtesy of Paul Edward Bumgardner.  Picture of the family.
Photo courtesy of Nicholas Todd Bumgardner.  Picture of (crazy) Aunt April and Paul.  (Yeah another picture of me and its a doozy!)
Photo courtesy of Nicholas Todd Bumgardner.  Picture of Kayla.  Poor Kay.  She was trying to do the Jr. Birdman face and didn't quite get it finished before Nick took the photo.  But she looks cute none-the-less.

Wednesday, December 28, 2011

Cape Tutorial

For Christmas I made capes for all three kids.  Nicholas and Paul both received 2 capes; and Kayla got one.  I had looked at patterns at the store, some photos online, etc. but really didn't feel inspired by anything I saw.  So, I sat down one night and just figured out how I wanted to make them myself.  Basically that is what makes me happiest.  I don't like patterns.  I never have.  I don't know why but they confuse and confound me and I generally just prefer to figure out how to measure and cut and piece things together myself.  

So, going along with that, this tutorial will not include a specific pattern but just a set of 'guidelines' to show you how you can go about cutting and piecing together your own capes for your kidos to enjoy!  I hope you like them!  Please let me know if any (or all) of this is confusing, missing steps or just odd.  I've never done anything this in-depth and I hope it is relatively easy to understand.  I appreciate any feedback you have for me and any comments (as long as they're not terribly rude) that you may have.  All comments will be moderated, so if I don't like it; I won't post it!  Blogger's prerogative!  (But seriously, let me know I want to get better at this and make things people can use and understand!)


First thing first.  I used flannel fabric for my capes.  This was mainly because I wanted them to come out like blankets.  I have a hope that if they kids really like them and want to sleep with them they will be like blankets and will be easy to wash and use over and over.  I am all about comfort and the snuggle factor and I know my kids are too.  All three of my babies are big snuggle kids and have blankets, stuffed animals, etc. that they sleep with so this was a major factor for me.  You don't have to use flannel for your capes, I just prefer it and found it made a nice sturdy, solid cape that wasn't overly heavy.


What you will need:


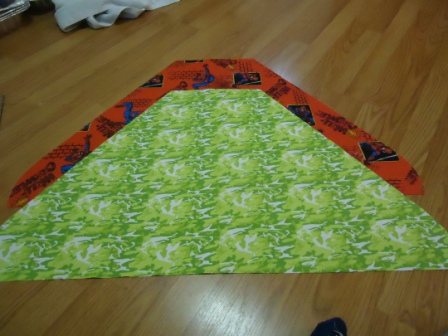
This is the fabric I used for one of the capes for my youngest nephew.  He loves trains and I love dinosaurs.  They don't particularly coordinate, but I like the way they go together.

Fabric for my niece's cape.  These go so well together.  The green of the frog fabric matches the bow on the Scottie perfectly!

The fabrics for one of my oldest nephew's capes.  Both sides are a bit busy but things he loves.  They don't have to look good together, just be things they will love to imagine and play with!
  • 1 yard each of 2 coordinating (or not) fabrics, flannel or cotton.  The fabric MUST be washable.
  • Velcro
  • A plate or other round object for the pattern (optional)
  • Whatever you like to use for cutting, piecing together, marking fabric, etc.  I use a pencil, my clear quilters ruler, my cutting mat, good Fiskars Scissors, pins, and my rotary cutting tool.
  • Your iron, ironing board and potentially spray starch and/or water. 
  • You will also need a large surface area to work on to do all of the patterning, cutting, pinning and piecing.  (I like to work on the floor in my living room or kitchen on the hard wood as it gives me plenty of space but a good sized table would work great!)
Step 1


Iron all your fabric.  This is the most important thing to do throughout the process.  Iron, iron, iron.  I am a big fan of the impact that ironing can make on your work.  It will flatten out your fabric to make sure you have a nice smooth surface to work with.  When you have ironed out each yard, fold it in half right sides in (wrong sides facing out) and press out a nice seam at the middle.  This will be the center of the cape and will help you when it comes time to make the pattern and cut out the pieces.  Do this with both yards of the flannel or cotton.  Place both pieces together, one on top of the other.  This way you will draw your pattern out on the top pieces and cut both pieces at once.


This is both pieces of fabric for one of Paul's capes.  They have both been ironed and have a nice pressed center 'seam'.  I have placed both fabrics together to prepare to draw out my pattern.  I will draw the pattern on the Spiderman fabric but will cut both fabrics at once.


Step 2

 Now we'll draw out the pattern.  There are two sizes I used.  Since Paul is 2.5 his capes were slightly smaller.  Kayla & Nicholas are 7 and 6.5 so their capes needed to be a little bigger.  

First we'll draw out the line for the neck piece.


At the top of your fabric place your ruler/flat edge and draw in 5-6 inches for the neck.  I used 5 inches for Paul and 6 for the older 2.  With the fabric folded this will end up being 10 and 12 inches raw.
  Next we'll measure down for the raw length of the cape.


For Paul I measured down 22 inches and Nicholas & Kayla 26 inches. To measure, start at the neck line and measure down the center pressed seam using your rule or measuring tape the length that you want your cape to be. Make an indicator at the spot where you want the length to end. You can adjust your size according to the size of your children and the size you want their finished cape to be.  I did not want my capes to be long where the children will be tripping over them or they will be getting caught.  But, I wanted them long enough to 'grow' with them for a little while.  Measure accordingly.
Now we'll measure and draw out the bottom of the cape. 


At the mark indicated for the final length of the cape, line up your ruler.  Draw out the bottom line of the cape.  I chose to go the entire width of the fabric.  The bigger, the better.  But, you can make it smaller if you wish.
Now, we'll make the diagonal line to connect the neck line and the bottom line.


For this I just eyeballed the angle from the end of the neck line to the edge of the bottom line. Line them up as best you can and draw it out.  Be sure to go over all your lines to make sure they are very visible.  You will want to be able to see them well when you are cutting to make sure you get everything well cut.
This is what your fabric will look like with the pattern when you are all done with the initial drawing.
  Now, this step is optional; but I like it.  You could just leave the edge in a triangular shape at the bottom.  However, I liked a more rounded edge at the bottom of my capes.  This is where the plate comes in.  For this I take the plate and lay it out at the bottom line and make a rounded edge for a little more flare.

Lay the plate on the fabric like this and simply trace around the right edge of the plate that lies in the pattern.
Here is the final drawn pattern.  This is the small pattern for one of Paul's capes.  Thus the large amount of extra fabric at the bottom.
Step 3


Now its time to Cut!


With both pieces of fabric still together, start cutting.  Keep them nice and flat, laying on your surface and cutting slowly.  It saves so much time and will keep your pieces identical if you cut them together.  Just take your time!!!!!!  I usually cut all the straight lines first, then come back to do the rounded corner.  It makes things easier and leaves me nicer squares of remnant fabric to work with later on.  Be sure to use good scissors.  I am a fan of Fiskars.  In this photo I am using my Titanium non-stick scissors, but also use my rotary cutting tool (also Fiskars) to cut on my cutting mat.  Invest in good scissors, it is worth it!
Here are the fabrics, still folded all cut out.

Same fabrics, opened up, after cutting.  Much bigger and exactly the same.  Love it!
Step 4


Now we need to cut and make the tabs that will hold the capes on when they are worn.  This is pretty simple and straightforward.

You will need 2 pieces of each fabric in a 3 inch by 5 inch rectangle.  Measure, draw and cut them out.
Here are my 4 pieces.  Nothing fancy, just 4 rectangles.  I use the same size regardless of the age/size of the child.  These seem to be pretty functional for all ages.

Pin 1 of each type of fabric to its opposite right sides together.  Pin at the corners.

Sew up three sides of the tabs.  Turn out the fabric to the right side and press out the seams.  I use 1/4 inch seams for all seams on my capes.  Each tab will have one side of each type of fabric.
Cut approximately 4 inches of Velcro for each tab.  Place opposing sides of Velcro on each of the 2 tabs.  Put the Velcro on different sides of the tabs.  This way they will come together to close nicely when they are attached.  Pin in place roughly in the middle of the tab, at approximately the same place at the top of the tab.  (Measure if you want, I'm not that picky anymore.)
Once you have sewn the Velcro into place that is it for now.  Now, we'll move on to piecing together the entire cape!


Step 5

Now we'll start pinning together and sewing the entire cape.  Once its all said and done this part (if done right) goes relatively quick and will be done in a jiff!

Place the finished tabs on one side of the fabric.  You will need to lay the tabs with the opposite side facing up.  Line up the raw edge side of the tabs to the raw edge of the cape.  Next, lay the other cape piece on top right sides together (the wrong side will be facing up toward you).  Pin the tabs in place first to make sure they stay.  Then start pinning the entire way around the fabric, lining everything up as well as you can.

Here are the 2 pieces of the cape right sides together (wrong sides out).  I have pinned around the edges to completely secure the 2 pieces.  This photo is along the bottom of the cape.  Toward the middle of the bottom I have placed several pins in the opposite direction of the rest of my pins.  This is an indication for me that I will stop sewing here to leave an opening to turn my fabric.  I have found this is the best way to remind myself so I don't get carried away with my work.  When you come to the first pin when sewing, back stitch 1 or 2 times to re-enforce the stitching for when you turn the pieces.  Tie off and then pick up on the other side of the opening.  Do the same with the back stitching there and finish stitching around the rest of the cape.  Again, I use a 1/4 seam for all of my work.  You may use a larger seam or whatever you are comfortable with.
So, now you sew!  Sew around the edge of the cape, being sure to leave at least a 3 to 4 inch opening at the bottom to turn the fabrics right side out.  We will close this up at the end.  


Step 6


Now its time to finish your piece.  Unfortunately I forget to get pictures of this part.  But, here's what you do.  Once you have sew it up, turn the piece right side out.  Press out the seams and press the seams under for the opening where you turned it right side out.  Pin that area together.   Be sure to iron around the seams of your entire piece.  This helps to 'bond' the stitches and makes a better look for the entire piece.  This is true for ANY sewing project!


This is the bottom of my piece where the opening was.  After it was ironed and pinned I began to sew around the edges.  I sewed here first to close the hole, then to make the cape look uniform and have a more finished look I sewed around the entire edge of the cape.  This is about an 1/8 inch seam.  It has to be much smaller to 'catch' that seam where the hole is and will also look a little better for the finish work.
Now, you're done!  The capes are ready to wear!

Finished Cape!  This is one of the larger capes. 

This is one of the smaller capes for my 2 year old nephew.
I hope you enjoyed the tutorial and that it was easy to understand.  Please let me know if you have any comments or questions.  I hope your children enjoy the capes as much as mine have (at least so far).  See  here to see a few pictures of them in their capes on Christmas Day.  Best wishes for lots of fun!